Thursday 17 December 2009

Christmas Cupcakes 2

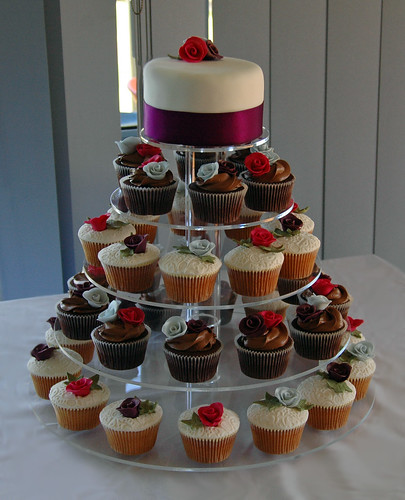
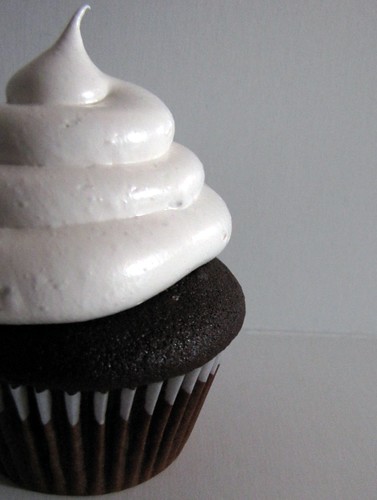
photo courtesy of Cherrapeno.blogspot.com


As promised, I am going to let you in on a few more of my Christmas cupcake ideas! It's just a week or so before the big day and cupcakes are so easy to make and so much fun to decorate! So if you still need to think up a dessert look no further, these treats are sure to please.

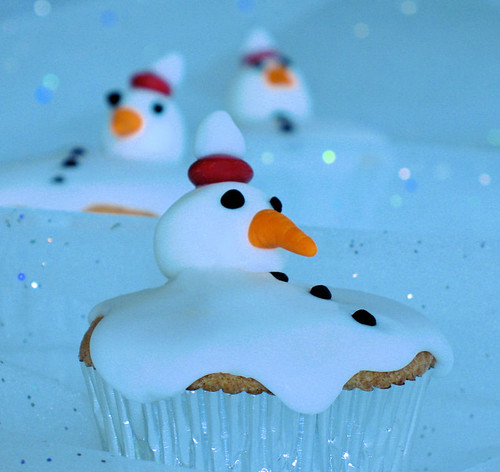
1. Melted Snowman Cupcakes
These are probably my favorites because they're just so adorable and silly. You can use whatever base you want, vanilla, chocolate, red velvet...you name it! You could also be more festive and make gingerbread cupcakes, roasted chestnut cupcakes, or you could keep it simple. Here's what you'll need:

Ready to roll fondant
Orange food coloring
A Tube of black icing
A red M&M for the hat
2 cups of powdered sugar

Roll some fondant into a ball for the head of the snowman, and a smaller ball to top off the hat. Color some fondant orange and shape it into a small carrot which will be used for the nose. Now mix the powdered sugar with some cold water. There's no exact amount, but add it slowly. You will want this icing mixture to be slightly runny, but don't overdo it or you'll have messy snowman cupcakes instead of melted snowman cupcakes!
Now spoon some of the icing over the cupcakes. Place the snowman head on the cupcake, and place the carrot on the snowman's head for his nose. Use the black icing to dot on buttons and eyes. Using some icing as adhesive, place the M&M on top of the head for the hat, and place the small ball of fondant on top of that. Viola! Melted snowman cupcakes.

2. Christmas Wreath Cupcakes
If you're going for ease, this is the one you want. These cupcakes are so easy to decorate, yet so festive. All you will need is:

Any cupcake base
white frosting (vanilla, cream cheese, boiled, etc)
Red and green M&Ms or other round and small candies

Take your cupcake and frost it. Make sure the frosting is flat, no fancy swirls needed for these cupcakes. Take your green M&Ms and place them flat in a circle (you choose the size) on your frosting. Leave one M&M out, so it's an almost circle. Now take two red M&Ms. You are going to place them on the cupcakes so that they are on there sides. Have them both angled inwards, like a triangle. And....that's it! These are the easiest Christmas cupcakes to make and you could really get creative with the red and green candies, making all sorts of designs. If you get white candies you could make snow flakes, Christmas lights, or whatever you want.

That's all for now. Soon I'll post some new cupcake recipes and don't forget about Valentines Day! It's right around the corner and I'll have loads of cupcake decorating ideas prepared.

Happy Holidays and enjoy your cupcakes.

Sunday 29 November 2009

Christmas Cupcakes

Christmas is one of my favorite times of the year, and none is complete without a batch of homemade Christmas cupcakes. Decorating cupcakes for Christmas is one of my favorite things to do. I love the Christmas colors and there are so many wonderful themes to choose from for you Christmas cupcakes! Just thinking about it, I don't know how I would cover all of my ideas in just one post, so this might be a 2 part post.
First let's cover what we all know and love - Christmas colors. If you're unsure how to decorate and frost cupcakes for Xmas, you can't go wring with red, white, and green. My favorite Christmas cupcakes, and the ones that always get the biggest smile, are my winter themed ones. Let's get started.

1. Winter Christmas Cupcakes or Easy Snowman Cupcakes
For this you will need: cupcakes, white icing, sugar or coconut flakes, marshmallows, pretzel sticks, chocolate covered peanut cups, chocolate sprinkles, fruit roll up for the scarf, and orange or red gummy fish.
These Christmas Cupcakes are so simple to make, I've been doing it since I was a child! First you must choose your cupcake base. Red velvet cupcakes are always a great option for Christmas, seeing as they're red, but any cupcake base can work and you should be able to find a great deal of recipes on my site! After you bake your Christmas cupcakes base, you should wait for them to cool. For these cupcakes, I use any white frosting. You can choose from buttercream frosting, boiled frosting, or cream cheese frosting. For this purpose I'll go with buttercream. Frost your cupcakes so that they have a flat top. I usually use two marshmallows for the snowman but if you want to use three, that will work two. I place one in the center of my cupcake. Thank I dab some frosting on it. Then I cut off about a quarter of the second marshmallow and place the 3/4 piece ontop of the first. I dab some frosting on the top and place a small peanut butter cup. If it's too big, cut it in half! For the snowman's scarf, take a fruit rollup and cut a thin strip. It should be about four or five inches long. Wrap it around the snowmans neck and secure one end over the other with some frosting. Now wet a toothpick and stick your snowman three times for buttons and twice for eyes and a few more times for a smile. That is where you will put the sprinkles. For the nose simply cut off the end of a gummy fish. Last, sprinkle some sugar over it, or coconut flakes, for a fresh snow look. These Christmas cupcakes are sure to be a hit with everyone!

2. Christmas Cupcakes - Christmas Trees!
This decorating idea is a little more complicated than the first one but the end result is really wonderful and you can play around with these Christmas cupcakes making them as festive as you want.
What you need: Cupcakes, Waffle cones, White frosting, small candies, pastry bag with a star tip.
For this recipe I would go with vanilla cupcakes or chocolate cupcakes, but any cupcake will do. I prefer chocolate. Bake your cupcakes and wait for them to cool. For the frosting you can either keep it white or put some green food dye in it. I would keep it white, but to each his own. When the cupcakes have cooled, put a flat layer of frosting on top of each cupcake. I like cream cheese frosting for these. Now take a waffle cone and place it upside down on top of the cupcake. Fill your pastry bag with frosting squeeze out small stars all around the cone. It gives the appearence of a snow covered Christmas tree! If you want you can leave it as so. Or you can go ahead and decorate your tree however you like.

That's all I have for now, but I promise in the next two weeks I'll be right back here with two more cupcake decorating ideas for your Christmas Cupcakes!

Saturday 19 September 2009

Halloween Cupcakes


image courtesy of clevercupcakes

Hi everyone! I'm back after taking a long vacation with new recipes and ideas and decorating!
Before I get started on Halloween Cupcakes, I've gotten a lot of emails requesting cupcake recipes. I'm thrilled that everyone loves cupcakes so much, though about 50% of the recipes requested by email I already have posted on this site. So if I don't respond to your email, it's only because the recipe is already posted here!

Enough of that, let's talk Halloween! Halloween is probably one of my top three favorite holidays since I was a child. As a youngster, I loved dressing up and trick or treating. As a young adult I enjoyed dressing up and dancing, and as an adult I so much enjoy dressing up, giving out treats, and baking for the holiday. One of my favorite Halloween treats are Halloween cupcakes. They're so delicious and you can have unlimited fun decorating them.

A great base for your Halloween cupcakes is either a vanilla or a deep chocolate base. Chocolate cupcakes are good if you want to use white frosting (or orange) (or a swirl!) and vanilla cupcakes are good for a white base with orange and chocolate frosting or good if you want to add some orange food dye for an orange base. Either way, I would say keep your base simple because you're going to go crazy decorating Halloween cupcakes! If you do want to be more adventurous though, a great alternative is pumpkin cupcakes. They're very festive and perfect for the season.

You can find recipes on this site for all of your cupcake recipe needs and frosting recipe needs. Just look at the links on the right under labels!

Now lets get to the point: Halloween cupcake ideas. Before I start, most Halloween cupcakes will have a flat frosting, meaning no fancy swirls or peaks.

1. Pumpkin face decoration: This is by far my favorite Halloween cupcakes decoration. It's traditional and works every time. For this you will need to use vanilla frosting or pumpkin frosting. If you're using vanilla you need to use food dye to make an orange frosting, this can be accomplished by combining red and yellow. Lay a flat layer of the frosting on your Halloween cupcakes. Now you'll need a pastry bag with a small tip and fill it with chocolate frosting. Use the chocolate frosting to make the pumpkin face. Triangles for eyes and a toothy grin should do the trick!

2. Ghost cupcakes: These are fun and easy to decorate! These Halloween cupcakes are simple. I would use a chocolate cupcake for your base, or a orange vanilla or pumpkin base. Simply place a white, flat layer of frosting on the cupcake. Then take a marshmallow and place it on top of the frosting. You can frost the marshmallow for a more textured and ghost shaped Halloween cupcake or you can leave it bare. Now you'll need candy coated sesame seeds, or something similar and place it on the ghosts for the eyes! Viola! Perfect ghost cupcakes!

3. Candy corn cupcakes: These, too, are great Halloween cupcakes. They're easy to make and fun to eat. (They don't actually have candy corn in them). You will need chocolate cupcakes for this, and vanilla icing in white, yellow, and orange. You will also need a flat icing spatula for this one. First with your spatula plop down the white icing in the center of the cupcake. Pat it down in the center to push the edges out a little. Wipe off your spatula. Then take a smaller plop of orange frosting and plop it in the center of the white frosting. Pat it down in the center to push the edges out, but not quite as far as the white. Repeat this process with the yellow frosting but again with a smaller plop. Now take the spatula and carefully swirl these frosting together into a peak. You will apply slight pressure on the edge of the spatula and start from the outside of the frosting and work your way in and up!

4. Graveyard cupcakes: Again, a great treat and a perfect Halloween cupcakes. You will need chocolate frosting, green sprinkles and milano cookies cut in half. First put down a flat layer of chocolate frosting onto your cupcakes. Then sprinkle some green sprinkles over it, this is your grass. Take a pastry bag with a small tip and write things on the milano cookies such as "R.I.P" or put a cross. Now take the milano cookie and place it on the cupcakes, pushing it into the Halloween cupcakes slightly so that it will stay upright.

This should give you a great start in getting ready for Halloween!
These Halloween cupcakes ideas are sure to impress and you'll have so much fun baking and decorating them. Enjoy your Halloween and come back for more cupcake recipes and ideas.

Sunday 9 August 2009

Chocolate Cupcakes

photo courtesy of sifu renka
I've had a lot of requests over the past month for chocolate cupcakes. I don't know what sparked it, but I was a little surprised to realize that I hadn't yet posted my recipe for chocolate cupcakes. These cupcakes are so easy to make and so delicious. These are chocolate cupcakes for the chocolate lover! When it comes to classic cupcakes, simple is better and that's what I'm doing here. These can be paired with vanilla, cream cheese frosting, buttercream, or chocolate frosting (but only if you really really like chocolate).
Chocolate cupcakes are great for holidays such as Halloween, Valentine's Day, and the fourth of July. They go great with any decoration, such as sprinkles and chocolate cupcakes look amazing with any white icing.

My mouth is watering already!

Chocolate Cupcakes for the Chocolate Lover

Makes about a dozen treats!


3/4 Cups unsweetened dutch process cocoa powder (or regular cocoa powder)
3/4 Cups hot water
3 Cups all purpose flower
1 tsp baking soda
1 heaping tsp baking powder
3/4 tsp salt
3 sticks unsalted butter
2 1/4 cups sugar
4 large eggs
A generous splash of vanilla extract
1 cup sour cream

Preheat your over to 350 degrees. Beat together cocoa and hot water until smooth. In a separate bowl, mix together flour, baking soda and powder, and salt until well combined.
Melt butter and sugar together in a saucepan over low-medium heat until smooth. Once smooth, transfer to mixing bowl and beat on medium speed until smooth. Add eggs, one at a time. Add cocoa and mix. Add vanilla and mix well. On low speed, beat in the flour mixture. Don't over mix! Now pour cupcakes into the cupcake tins and pop your chocolate cupcakes in the oven. Bake for around 20 minutes, rotating pan at the halfway mark.

You can store your chocolate cupcakes for up to 2 days, or in the freezer for up to two months but they taste so delicious when they're fresh. Frost them with chocolate, buttercream, or cream cheese frosting for an extra tang! Sometimes I like to top them with just some powdered sugar. These chocolate cupcakes are very rich and frosting might be too much for them. If you want a lighter frosting, go with boiled. This also tops chocolate cupcakes off great, but my favorite is the cream cheese.

Adding a little red and yellow food dye to the icing and topping it on these chocolate cupcakes makes for great Halloween cupcakes and with Halloween right around the corner, who can resist? Top with candy corn or orange and chocolate and white sprinkles.

Chocolate cupcakes are just another recipe from my collection. The cupcake are delicious, and you will no doubt enjoy eating them just as much (probably more) than making them. This chocolate cupcake recipe should hold you over till next time. Thanks for reading!

Thursday 30 July 2009

Cream Cheese Frosting


image courtesy of elana's pantry
No cupcake is complete without frosting, and one of the most popular frosting is cream cheese frosting. Cream cheese frosting is versatile and easy to prepare. It's often seen on red velvet cupcakes and carrot cupcakes, and zucchini cupcakes but gives a nice tang to chocolate cupcakes, too!
It's soft and creamy which makes it a fun consistency to decorate cupcakes with. It's easy to swoop and swirl around the top of your cupcakes. Basic cream cheese frosting can be altered with flavoring such as vanilla and maple to add some extra pizazz, but alone it holds a lot of character.

Here's a great recipe for Cream Cheese Frosting from my own personal collection!

8 oz (2 sticks) unsalted butter
12 oz cream cheese
3 3/4 cups confectioners' sugar, sifted
1 tsp vanilla extract


Make sure all of your ingredients are room temperature. In a mixing bowl, mix butter on medium speed until light and creamy. Add cream cheese and mix until fluffy. Slowly add the sugar, one cup at a time. Continue to mix. Finally, add the vanilla extract to the mixture and mix until it has a creamy consistency.

You can store this frosting for up to three days in the refrigerator in an airtight container. When you are ready to use it simply mix it with an electric mixer until it becomes smooth.

This should give you excellent frosting to top your cupcakes with! If you want to alter it to make it Maple Cream Cheese Frosting, simply add maple extract instead of vanilla. You can also play around with this cream cheese frosting by adding a pinch of nutmeg or cinnamon. This will spice things up and tastes great on pumpkin cupcakes (Halloween!) or on apple spice cupcakes. Cream cheese frosting tastes great with most every cupcake though I wouldn't recommend topping off vanilla cupcakes with this frosting.

Though this recipe seems easy, it's still produces a very elegant frosting. The best frosting recipes, in my opinion, are easy to make because frosting shouldn't be too complex. Cream cheese frosting is easy to make, save the complexities for the cupcakes.

Other great ideas for your cream cheese frosting is to add some mini chocolate chips to it. Also, I have before experiment with using whipped heavy cream in place of half of the butter and this yields a delicious whipped cream cheese frosting. You can also add some shredded coconut on top of the cream cheese frosting. Finely chopped up mango also adds to this traditional recipe.

Since cream cheese frosting has cream cheese in it, make sure you store it in the refrigerator and don't leave it out too long. Also, don't leave it in the sun for too long because it will melt and become very messy. Aside from that, have fun! Experiment and enjoy your cupcakes, whatever they may be.

This cream cheese frosting recipe is the last one you will ever need.

Good luck and come back soon for more cupcake recipes and frosting recipes!

Saturday 18 July 2009

Homemade Chocolate Frosting


photo credit: Frances Berriman

Cupcake frosting comes in many different flavors but the staples remain vanilla and chocolate. Vanilla buttercream is probably the king of all frosting, but in a close second is chocolate frosting and there's nothing to wet the palate quite like a big bowl of homemade chocolate frosting. Chocolate frosting tops off any cupcake and tastes especially good atop vanilla cupcakes. Decorating chocolate frosting can also be a lot of fun. Generally I use muted and pastel sprinkles with white frosting, but with homemade chocolate frosting I like to use brighter colors: bright blues, yellows, purples, and pinks look especially nice.
Here's a great and easy recipe from my personal collection for homemade chocolate frosting.

Makes enough for around 30 cupcakes.

2 cups (4 sticks) unsalted butter
14 oz semisweet chocolate, melted and cooled
2.5 TBSP milk
2 tsp vanilla extract
5 cups confectioners sugar

Beat butter until smooth. Add chocolate until combined. Add the milk, vanilla extract, and confectioners sugar and beat until combined on medium speed. Don't over mix!

That recipe should suit your craving for chocolate. It's very rich yet somehow always comes out just right. You can store the homemade chocolate frosting in a sealed container overnight and in a refrigerator for up to a few days. Let it sit until it's room temperature if you're going to store your homemade chocolate frosting in the refrigerator. Sometimes the chocolate frosting will dry out and if that's the case don't be afraid to add some milk and then beat until smooth and creamy. But be careful not to add too much milk, a little milk goes a long way and it's better to have to add more than to add too much.

Another thing to be aware of with homemade chocolate frosting is that it creates an outer shell very quickly. Generally when I make cupcakes with vanilla frosting I frost 24 at a time and then decorate with sprinkles or whatever else I might be using. I've found that anymore than 24 at a time and the frosting forms a thin hard shell on the outside and it loses it's stickiness making it more difficult to decorate. Chocolate frosting forms a shell even quicker and will lose it's stickiness soon after frosting the cupcakes. Of course it depends on how long it takes you to frost the cupcakes, but I usually decorate after 6, sometimes after 12 but 6 to be safe. Chocolate frosting forms a shell quicker because it has chocolate in it which is dryer than butter, which is the main ingredient in vanilla buttercream frosting.

If you want to add a little pizazz to your homemade chocolate frosting, I will suggest a few ways to go about it. You can always add chocolate chips. I find that mini chocolate chips work better than regular ones. You can also make a chocolate frosting swirl. This is simple, all you do is make two separate batches of frosting - one with darker chocolate and one with lighter. Depending on how you frost your cupcakes, the method of making a frosting swirl will differ. The way I do it is with a flat and long metal spatula. I first tap on one chocolate frosting and then in the center I tap on the other chocolate frosting. I then gently press down with the tip of the spatula and flick my wrist a make a swirl! It definitely takes some practice and getting used to, but once you figure it out you'll be making chocolate frosting swirls before I can say "I love cupcakes!".

One last idea for a twist on homemade chocolate frosting before we wrap up. This one is for all you people out there who like chocolate frosting but who also like white frosting (that's me!) Try substituting the chocolate for white chocolate. That way you'll have excellent white chocolate frosting that will pleasantly surprise anyone who takes a bight out of it. You can even make a chocolate frosting and white chocolate frosting swirl.

Enjoy your homemade chocolate frosting and come back for more great cupcake recipes!

Sunday 5 July 2009

Pink Frosting


photo credit: jspad

Lately I have gotten a few requests for a pink frosting recipe. I'm not really sure what is means by pink frosting, but I'll give it a go and give you a few options for topping your cupcakes with the pinkest frosting on this side of the Ecuador.

Pink Frosting Ideas:

If you are making regular buttercream frosting, turning it into pink frosting is a piece of cake (no pun intended). One of the great things about buttercream frosting is an ability to turn it virtually any color you'd like! So, to make pink frosting just add two drops of red food coloring or red food dye into the frosting after the recipe is completely. Mix it in and viola! If you'd like a deeper pink frosting, add another drop or two, and if you'd like a lighter pink frosting start of with just a drop. Easy as pie.

Another option is to add a splash of beet juice to the frosting. This is a great option because red food dye can be hazardous to your health and contains dangerous chemicals. Adding beet juice will also give you pink frosting and I suggest you use this method over the other. You make this pink frosting the same way: by adding a splash of beet juice to the frosting once it is completed. Beet juice can be very strong so be wary.

If you want a fruity pink frosting you have many options. Crushed raspberries create an amazing pink color and I've often used them to color frosting. Adding a handful of crushed raspberries will give you a nice pink frosting and give the flavor a little kick! You could also use cherries for pink frosting. Frozen cherries will add a nice color to the frosting, as well. And last but not least you could make your pink frosting using strawberries. Crushed or cut up, they'll definitely give you the color you want. Strawberries don't run as much as raspberries and cherries, so you'll probably have to use more to get the pink frosting you desire. Any of these will work fine, though.

Creating pink frosting is easy and you could use food dye to create any color frosting you desire, using the same method. For lighter, more pastel frosting use less and for deeper and richer colors use more. It's really simple and gives your cupcakes the pizazz you might be looking for.

Pink frosting is perfect for Valentine's day, bridal showers, baby showers, and birthdays for girls and women alike! No one doesn't like pink frosting and it really does it's job topping off your vanilla cupcakes. I hope your pink frosting is a hit!

Saturday 27 June 2009

Cupcake Cakes


photo courtesy: Bev (sugarbloom cupcakes)


Cupcake Cakes
: What are they? Where do I get them? How do I make them?

Cupcake cakes are probably exactly what you are picturing. It's not a big cake in the shape of a cupcake (yes, that exists too but it isn't what we're talking about). Cupcake cakes are seen most of the times at special events and holidays, namely weddings and sweet sixteens and birthdays. A lot of bakeries also use cupcake cakes to display their cupcakes.

So, in case you still don't know, a cupcake cake is simply many things. Cupcakes placed on a cupcake stand in the shape of a cake can be a cupcake cake. Sometimes there will be a small cake on top of the stand, but more often than not cupcake cakes are really just cupcakes. Cupcake cakes are also cupcakes placed down in the shape of something to create a shape, such as a snake, or numbers.

If you would like to know how to make cupcake cakes, here are some tips that are sure to help you out. As your base for your cupcake cakes, you should always use a cake board, or some kind of cardboard, wrapped in foil. This will make it easier to move your cupcake cakes, otherwise you'll have cupcakes falling all over the place.

Before you begin making your cupcake cakes, it would probably be wise to take a moment and decide what exactly it is you are doing. Map it out. Get a sketch book and sketch! Do the math, take measurements, make sure you have the right tools. While making cupcake cakes isn't brain surgery, it will be a lot easier if you know what you're doing before you do it.

My last piece of advice is to leave the cupcakes in the cupcake liners. While this may seem contradictory to the idea of a cake, your cupcake cake will have better presentation if you leave them in the liners. Also, to keep the cupcakes in place, it helps to put a little dollop of frosting beneath each one. It will make your cupcake cakes stable and magnificent!

With cupcake cakes, there really is no right and wrong way to go about doing things. Get creative and make it your own. As far as frosting the cupcake cakes go, there are many ways to do that, too. First you must decide whether or not you want your cupcake cakes to look like cupcakes, or to look like a cake. I prefer the cupcakes, but whatever floats your boat! The trick to frosting your cupcake cakes is to treat it how you want it to turn out. If you want each individual cupcake to stand out on its own, then decorate each one separately. But if you want the cupcake cake to appear as though it is one cake, treat it as a whole and don't think about each cupcake separately. Again it would be wise to map out the frosting and decorations for your cupcake cakes, especially if you want them to look more like cakes.

You may be wondering what the advantages are to having cupcake cakes over a regular cake. Well, I'll tell you. First of all, cakes are boring. We've seen them before and we want something different! Cupcake cakes are cute and unique and add a nice twist to the celebration. Another advantage of cupcake cakes is portion control. No worrying about cutting pieces of the cake and making sure they're the right size. Cupcakes are a no hassle kind of dessert.

So sit back and enjoy your cupcake cakes and come back soon for more recipes and cupcake ideas!

Thursday 18 June 2009

Vanilla Cupcakes

photo credit: castsugar.blogspot.com


If you're looking for a good old cupcake, the kind of cupcake that brings you back to childhood, the kind that just can't go wrong, you're looking for vanilla cupcakes. These delicious cupcake treats are the most traditional you can get. Vanilla cupcakes with vanilla buttercream frosting are extremely loved and can be found in pretty much any cupcake bakery you can imagine.
The recipe I am about to give you for vanilla cupcakes is my own personal recipes. I developed it from months of experimentation and studying other cupcake recipes.
These vanilla cupcakes are extremely moist and full of rich vanilla flavors. They are just the right amount of sweet and vanilla and I think you'll find these vanilla cupcakes completelly irresistible. The recipes is so easy to follow and will yield between 2 dozen and 30 vanilla cupcakes.

Vanilla Cupcakes

1 3/4 cups of cake flour
1 1/4 cups of all purpose flour
1 cup (2 sticks) of salted butter
2 cups of sugar
1 heaping TBSP baking powder
4 large eggs
1/2 cup whole milk
1/2 cup of plain yogurt
2 tsp. vanilla extract

Preheat your oven to 350 and line your cupcake pan with cupcake liners.
In a bowl mix together cake flour, flour, sugar, and baking powder. Make sure these are combined well. With an electric mixer on medium speed, add butter. It will be easier to cut the butter into small squares at room temperature. Don't just add the whole stick.

In a separate bowl, whisk together eggs, milk, yogurt and vanilla extract. Add this to the dry vanilla cupcake ingredients and beat until combined but don't over beat!

With the vanilla cupcakes batter, fill lined cupcake tins until about 2/3 full. Bake for about 15-20 minutes (give or take a few). You will know your vanilla cupcakes are done when you pat on the tops and they spring back up at you. If they sink then the vanilla cupcakes need more time. If this is too confusing, you can always use the old toothpick in the center trick and that should do it.

As far as frosting the vanilla cupcakes goes, I would suggest using the buttercream frosting recipe. Decorate your vanilla cupcakes with colored sprinkles, sugar candies or fruit.

Vanilla cupcakes can be used on any occasion, whether it be your wedding day, a holiday, a birthday, or just for fun! They're great to make with kids and the whole family will really enjoy these treats! If you'd like to make a vanilla cake using the vanilla cupcakes recipe, go right ahead. The recipe works both ways. The vanilla cake will take longer in the oven than the vanilla cupcakes, mind you, so make sure you keep a watchful eye on it if you decide to go that way.

If you'd like to color your vanilla cupcakes for a holiday such as Halloween, the fourth of July or Christmas, just add a few drops of coloring to the wet ingredients before you whisk and you'll have colored vanilla cupcakes in a jiffy.

The great thing about this recipes is that it's so easy to add to. Vanilla cupcakes taste great with chocolate chips, blueberries, etc. If you want a really great treat, when you're vanilla cupcakes are about halfway done in the oven, say 10 minutes or so, you can cut up peach or plum slices and place one on top of each vanilla cupcake. You can also cut up a peach or plum into small pieces and add it to the batter to transform your vanilla cupcakes into peach cupcakes or plum cupcakes!

Experiment! Go Wild! This recipe will fill all of your cupcake needs.

Hope you enjoy your vanilla cupcakes!

Monday 8 June 2009

Cupcake Stands

photo credit: slimmer jimmer

Cupcake stands are the perfect way to display your cupcakes. Whether you are baking them yourself or buying cupcakes, a cupcake stand is an elegant and fun way to layout your cupcakes.
Cupcake stands come in all sizes, so you can use them for a big event like a wedding, or a smaller event like a birthday.
For a wedding cupcake stand, it is customary to buy a tiered cupcake stand and have the caterer replace cupcakes as they are taken off and eaten. I'm going to review a few different kinds of cupcake stands so you get an idea of differences, where to buy them, and what's appropriate for which occasion.

The most popular brand of cupcake stands is Wilton. The Wilton cupcake stand comes in many different sizes and styles. The variety that Wilton offers is one of the reasons that their cupcake stands are so popular. The Wilton cupcake stand is also extremely durable. They're very good quality and are sure to last you a long time. A lot of the Wilton cupcake stands are very simple, thus very versatile. You can find an excellent selection of their cupcake stands on amazon, and in stores throughout the US and in Canada.


There are a few brands that make cupcake stands made out of Styrofoam. I would strongly urge you not to buy one of these. Not only is styrofoam a flimsy and ugly material that might not hold your cupcakes if they are heavy, it is also extremely unsustainable and bad for mother earth. We can definitely stay away from these cupcake stands. Brands include Bakery Crafts and Deco.

If you are not satisfied by a Wilton cupcake stand, I would recommend you try out Pronto, which has a great selection as does NexTag. You can also try out a Good Cook cupcake stand. They are very sturdy and made extremely well to last you a long time. They cost around the same as a Wilton, so it really comes down to a matter of taste. They also make a cupcake stand that will collapse to allow for easy storage and that is extremely handy!

Cupcake stands come in a few different materials. Most commonly you will see Glass, plastic, wire, and styrofoam. Occasionally you will find a porcelain or ceramic cupcake stand. The best material for a cupcake stand, in my opinion, is glass. It's so easy to clean cupcake crumbs and dried frosting off of a glass cupcake stand and it's a versatile yet decorative material. Styrofoam comes in last place. A lot of people buy wire cupcake stands and these are very attractive, but I do have a few issues with them. They're not easy to clean and occasionally, if you buy a cheap one, it might start rusting and you wouldn't want a rusty cupcake stand.

Most good quality cupcake stands will run you anywere between $15-$70. The price varies depending mostly on the brand and the amount of cupcakes the cupcake stand holds. Anything under $10 is probably not resuable and poor quality so I would suggest going with something that will last. If you have a tiered cake stand and don't want to buy a cupcake stand, you can definitely use a tiered cake stand to display your cupcakes. You can always find the perfect cupcake stand for any occasion, whether it's the 4th of July, your 40th Birthday, or just for fun.

Good luck finding the cupcake stand that is right for you and come back soon for all of your cupcake recipe needs!

Monday 1 June 2009

Buttercream Frosting

photo credit: cupcakequeen @ flickr.com


There are a limitless variety of cupcake frosting but the most popular and versatile is buttercream frosting. This goes excellent with any kind of cupcake, including vanilla cupcakes, chocolate cupcakes, and red velvet cupcakes. Buttercream frosting is traditionally made with two main ingredients: butter and powdered sugar. These are mixed together to make a rich, sweet, and creamy frosting.

Here is my buttercream frosting recipe, which will be a wonderful frosting to top off your cupcakes with.

Vanilla Buttercream Frosting

Makes enough frosting for about 2 dozen cupcakes

1 cup (2 sticks) of unsalted butter, room temperature
6-8 cups of powdered sugar
1/2 cup of milk
1.5 tsp vanilla extract

1. In an electric mixing bowl fitted with the paddle attachment or if you don't have an electric mixing bowl use a large bowl and an electric mixer, mix the butter until smooth and creamy (a few minutes).
2. Add 4 cups of the sugar, the milk and vanilla and on low speed mix until combined.
3.Add two more cups of sugar and on low speed mix until light and fluffy. If you need to, add the remaining two cups of powdered sugar.

Tips: When mixing together the buttercream frosting ingredients, be aware that powdered sugar is very light and will get into the air. You will know this is happening because when you breathe in you will feel and taste a sweetness in your breath. To avoid this, place a clean dish towel over the mixing bowl.

There 'ya go! Buttercream frosting made perfect for your cupcakes.

Buttercream frosting comes in a lot of different flavors, the most common is vanilla, which I have given you the frosting recipe for. It's also often seen in chocolate buttercream and occasionally in other flavors such as almond or peppermint. To get almond or peppermint buttercream frosting, simply replace the vanilla extract with almond or peppermint extract and alter according to your taste.


How to Care for your Buttercream Frosting

Buttercream frosting can be left at room temperature without melting. Do not leave your buttercream frosting in the sun. The best way to store it is in an airtight container. If you want to store your buttercream frosting for a few days, you can put it in an airtight container in the refrigerator and take it out a few hours before you plan to frost your cupcakes so it will defrost and soften up and make the buttercream frosting more spreadable. You can speed up this process by beating it. After you put your buttercream frosting on your cupcakes, the frosting will harden on the outside, so if you are going to decorate the buttercream frosting with sprinkles or other candies, I would advise you to do so immediately after putting it on your cupcakes. Buttercream frosting will form a hard shell in a matter of minutes (sometimes even quicker).

Good luck and come back soon for more frosting recipes and cupcake recipes!

Thursday 21 May 2009

4th of July Cupcakes

photo credit: bakingbites.com


With summer right around the corner, my favorite holiday is just about to hit. The 4th of July will yield many barbecues and other festivities and none is complete without some special 4th of July cupcakes!
Here are some great ideas for 4th of July cupcakes and frosting and decorating.

4th of July cupcakes take 1. If you're a naturalist like me, then you hate food dye. This makes baking and decorating 4th of July cupcakes difficult since we all know that you can't have 4th of July cupcakes that don't represent the red, white, and blue. This is why I'm starting off here, because if you can avoid chemically enhanced cupcakes then you should. For these 4th of July cupcakes you can use either a chocolate cupcakes, a vanilla cupcake, or a red velvet cupcake (using beet juice of course!). If you want to make these 4th of July cupcakes with vanilla cupcakes but you want the cake to be red, you can add a little beet juice in place of water. Beet juice is strong so careful!
For 4th of July cupcake I like to use vanilla frosting. That will be your white in your red, white and blue. 4th of July cupcakes should be festive, so use a vanilla frosting, cream cheese frosting, or boiled frosting and lather up those cupcakes! Now you may be wondering where your red and blue come in if you're not going to use food dye. Luckily the 4th of July is in the summer and fruit and summer go hand in hand. Decorate your 4th of July cupcakes with blueberries and raspberries. Or decorate your 4th of July cupcakes with strawberries instead of raspberries. Voila! If you want red icing, use beets! You will have marvelous natural 4th of July cupcakes that everyone will enjoy. A nice way to decorate is to make a swirl or circle of blueberries and stick a strawberry with the top cut off faced down on the top of your 4th of July cupcakes. What would really make an amazing 4th of July cupcake would be chocolate covered strawberries.
Enjoy!

4th of July cupcakes take2: Now that we've covered our natural 4th of July cupcakes, lets get down to the nitty gritty. The simple truth is, if you want blue 4th of July cupcakes, use a yellow cake and blue food dye, you want red, use a red food dye. Plain and simple. The same goes for the icing that you'll be covering your 4th of July cupcakes in. I like to keep things simple with a yellow or white 4th of July cupcakes topped with white frosting or chocolate frosting and then red, white, and blue sprinkles. If you're feeling really festive, your 4th of July cupcakes can adorn an American flag make out of sprinkles. You can also create different color frosting to top your 4th of July cupcakes and do a swirl or a patter atop your 4th of July cupcakes. They'll look really cute. Experiment! 4th of July cupcakes should be crazy and explosive, not safe and refined.

No matter how you decorate your 4th of July cupcakes, I assure you people will love them. 4th of July cupcakes will make your holiday extra special.

Come back soon for more cupcake recipes!

Love,
The Cupcake Gal

Thursday 14 May 2009

Wedding Cupcakes


photo credit: clevercupcakes

Cupcakes are the perfect treat for every occasion. Whether it's an annual holiday or a special occasion, cupcakes are sure to leave a tasty impression. Cupcakes are a very popular birthday treat, and they are becoming increasingly popular for weddings. Wedding cupcakes are the new "it" wedding treat. It seems like everyone has them at their weddings these day, from celebrities to friends to family. There are many different kinds of cupcakes that people have had at their weddings. Usually what makes them "wedding cupcakes" is the way that the cupcakes are decorated from the frosting, to the cupcakes liners, to the sprinkles.

If you're planning a wedding, the key to having amazing wedding cupcakes is white or pastels. Simple and elegant always takes the cake, no pun intended. Red velvet wedding cupcakes have become really popular wedding cupcakes because the red of the cupcake on the bottom with hot white frosting looks really festive and elegant. There are many different cupcake recipes that are used in wedding cupcakes and none is right nor wrong.

I think the best way to be decorating cupcakes for your wedding is to keep it simple. Try doing half of the wedding cupcakes in white buttercream frosting and the other half in a subtle pink frosting or a lavender frosting. Both of these colors will look charming atop either vanilla wedding cupcakes or chocolate wedding cupcakes, or any other variety of wedding cupcakes you may have.
As far as sprinkles go, wedding cupcakes look nice with white or any subtle color sprinkles. If you use bold colors on your cupcakes they might look like they belong at a child's birthday party. If your wedding is color coordinated, just use the colors that go with your decorations. The cupcakes will fit right in. Also, pearl white sprinkles look so nice on wedding cupcakes. They really give the cupcakes an amazing feel.

An advantage to using cupcakes instead of cake is that you can have a few different kinds. And if you want it to be tiered like a wedding cake is, just buy a display that has tiers and it will make your wedding cupcakes fit right into the feel of your special day. If you're making them yourself you can find recipes on the internet.
Martha Stewart has amazing wedding cupcake recipes and if you're looking I would highly recommend her website for cupcake recipes. She also has ones that are specifically for wedding cupcakes so that really is your one stop. And in addition she'll give you tips on decorating and presentation.

So good luck with your wedding cupcakes and I'll see you soon for more great cupcake recipes and cupcake ideas!

Monday 4 May 2009

Cupcake Liners

I recently discovered cupcake liners are now coming in reusable silicone. I know this is good for the environment and all, but there's something about the good old fashioned paper cupcake liners that I really love. I remember as a kid peeling the cupcake liners off the cupcakes and scraping down their sides, making sure I ingest every cupcake crumb, no survivors.
And paper cupcake liners can be recycled!
Another great thing about disposable cupcake liners is that you can buy them themed. They come in all different varieties, there are Christmas cupcake liners and Hanukkah ones, there are Halloween liners and birthday cupcake liners. Plus I like the way they form to the cupcake. They become the cupcake.

I know this may sound silly, but eating cupcakes is an experience and is not to be taken lightly. It actually makes people happy, and I think part of it is peeling away those cupcake liners. You can get them in pink, blue and yellow and white. I'm not talking about the foil cupcake liners, I'm talking about the the paper ones!

I'm pretty sure whole foods even sells them made from recycled paper. All I'm saying is this: new kitchen gadgets are good. But cupcake liners are just too traditional. You can't replace them. I just love seeing a table full of used cupcake liners and happy, smiling people.

I know in the midst of the earth's current situation maybe I'm being a little bit too nostalgic about my baked goods, but I'm speaking from the heart. I love cupcake liners and I'm not afraid to admit it. The cupcake papers that make my mouth water and my feet tingle. Yes, I have a crazy physical reaction to all things having to do with baked goods. I just found out about the silicone liners and I was taken aback and here I am venting about my love for paper cupcake liners. Maybe I'm over reacting (probably) but I really do love 'em. Three cheers for cupcake liners.

What are your thoughts on the whole cupcake liners situation?

Tuesday 24 February 2009

Cupcake Decorating

photo credit: www.marthastewart.com

Decorating cupcakes is just as important as baking the cupcakes. Studies prove that the way food looks effects how people perceive the taste and the entire experience all together, so decorating cupcakes should be a priority. Depending on the occasion you're baking for, your cupcakes should be decorated differently. Holidays are fun because you get to choose a them and decorate cupcakes based on that theme. For example, Halloween calls for orange and chocolate frostings, orange black and white sprinkles, and a spooky theme. Or if your cupcakes are for July 4th, you could decorate them in red, whites and blues and have a patriotic theme.

Decorating for special occasions, like a wedding or baby shower will usually call for more subtle and pretty colors and cupcake decorations. You should use white, pink, and lavender or baby blue and lots of white and pink sprinkles. The keyword here is pastels!

If your cupcakes are just for fun or a birthday, don't be afraid to go a little crazy. Use a lot of different colors of frosting, icing, sprinkles and much more. The crazier they are, the more people will love them so don't be afraid to over decorate your cupcakes.

The main tools needed for decorating cupcakes are firstly a tool for frosting your cupcakes. For this you can use either a pastry bag with assorted tips, or my personal favorite, a long, flat narrow spatula. Now for decorating cupcakes you will need sprinkles, sparkles, sugar treats, candies, etc. You could pretty much use anything your heart desires. Take a trip to your local baking supplies store and go to the decorating cupcakes aisle. You could even pick out some fun cupcake wrappers.

I'll be talking in the future about specific cupcake decorating ideas, but for now I just want you to remember that in this case, looks are important. Decorating cupcakes matters!

Tuesday 10 February 2009

Banana Cupcakes

Photo Credit: http://www.flickr.com/photos/santos/132324775

Banana Cupcakes are delicious. Though not the most traditional cupcake, the banana cupcake is one of my favorites and a definite crowd please. It's easy to use a banana bread recipe to make your banana cupcakes but I warn you they'll turn out more like muffins. Muffins are bread-ier than banana cupcakes should be. A good banana cupcake should be light and fluffy.

Many people enjoy their banana cupcakes with cream cheese frosting and I agree. But if you don't like cream cheese frosting, enjoy your banana cupcakes with regular buttercream, or boiled frosting. They even taste good with chocolate frosting! If you add a splash of honey to a frosting they taste amazing.

As for the best banana cupcake recipe I could find. Well I searched high and low for a moist and delicious, light and fluffy banana cupcake recipe and I found the banana cupcakes of your dreams right here. These are made with an excellent honey- cinnamon frosting. A real treat!

Or if you have a good banana cake recipe, I would suggest you even use that! Banana cupcakes and banana cake are exactly the same, (just the banana cupcakes are a bit smaller!). Banana cupcakes look great next to red velvet cupcakes. A sure crowd pleaser is red velvet cupcakes with boiled frosting and banana cupcakes with cream cheese frosting. It's something for everyone and no one will walk away unhappy.

Enjoy your banana cupcakes!

Boiled Frosting

Boiled Frosting

Here is my recipe for boiled frosting. You might be wondering - what is boiled frosting? Well, I'll tell you then. Boiled frosting, aside from being my favorite kind of frosting, is a delicate and subtle delicious frosting, generally with a little vanilla flavoring. Boiled vanilla frosting is most commonly used on red velvet cakes and red velvet cupcakes, though it tastes great on all kinds of cupcakes!

It's called boiled frosting because part of the process of making it calls for you to boil some of the ingredients - hence we get "boiled frosting". It's really delicious and is a great alternative for when you get bored of buttercream frosting, or other really heavy frosting. Boiled frosting wins in my book!

It's easy to make and I'll tell you how to do it:

1 1/2 Cups sugar divided leaving 2 TBSP aside
3/4 Cup of cold water
1 TBSP of corn syrup
2 egg whites
1/8 tsp salt
a splash of vanilla extract

Combine sugar (all but 2 TBSP), water, and corn syrup into a saucepan with a heavy bottom. Stir while cooking over medium heat until your sugar is dissolved. At this point it should look clear. Continue to let it cook until it becomes syrupy. Make sure you don't burn it or your boiled frosting won't turn out so keep an eye on it.
While it's cooking beat your egg whites till the form stiff peeks. Add the remaining sugar and beat. Add syrup while mixing until thoroughly blended. Add vanilla and continue to mix until it begins to form small peaks.

Viola! You have just made yourself some boiled frosting. Let it cool if it's too hot before frosting your cupcakes. Boiled frosting tends to melt if you leave it in the sun (you shouldn't be leaving your cupcakes in the sun anyway) but make sure you don't leave a bowl of boiled frosting in the sun because it will get ruined.

If you don't like boiled frosting, cream cheese frosting is also used on red velvet cupcakes. Use whichever you prefer! I prefer boiled frosting, but I know a lot of people who don't like it as much.

Good luck with your boiled frosting!

Red Velvet Cupcake Recipe


photo courtesy of emmyboop

I think by far one of the most popular cupcakes are Red Velvet Cupcakes.

Red Velvet Cupcakes are by far my favorite kind of cupcake. And I will share with you the best recipe I know of.

First some background. What are "red velvet" cupc
akes?

Red Velvet Cupcakes are rich chocolate cupcakes. They are called red velvet due to their distinctive rich red color. Originally, cocoa used to be a lighter shade and what gave red velvet cupcakes their unique color was a chemical reaction of unprocessed cocoa with the acid in the buttermilk. You can still buy this type of cocoa, however now more often then not it is red food coloring that makes the cupcakes red. I prefer to use the lighter cocoa for my red velvet cupcakes because food coloring is bad for you and the less chemicals we put in our bodies, the better. One thing's for sure, if your serious about baking you should know a little bit about health and food.

Red velvet cupcakes traditionally come wit
h boiled frosting which happens to be my favorite kind of frosting. However, nowadays red velvet cupcake recipe usually calls for cream cheese frosting.

The red velvet cupcake recipe I am going to give
you will allow you the opportunity to add either cream cheese, boiled frosting, or any other white frosting you desire. With this red velvet cupcake recipe, any white frosting will do.


2 1/2 cups sifted cake flour
1 teaspoon baking powder
1 teaspoon salt
2 tablespoons unsweetened cocoa powder
2 oz. red food coloring (two bottles) or 4 oz beet juice (if you use unprocessed light cocoa you can leave out the food dyes and you'll get a warm red/brown color)
1/2 cup unsalted butter, softened
1 1/2 cups sugar
2 eggs, at room temperature
1 teaspoon vanilla extract
1 cup buttermilk, at room temperature
1 teaspoon white vinegar
1 teaspoon baking soda

1. Preheat oven to 350 degrees. Line two 12-cup muffin tins or silicone pans with cupcake liners.

2. Sift together the cake flour, baking powder, and salt into a medium bowl and set aside. In a smaller bowl, mix food coloring and cocoa powder to form a thin paste without lumps and set aside.

3. In a large bowl, using a hand mixer or stand mixer, beat butter and sugar together until light and fluffy, about three minutes. Beat in eggs, one at a time, then beat in vanilla and the red cocoa paste, scraping down the bowl with a spatula as you go. Add one third of the flour mixture to the butter mixture, beat well, then beat in half of the buttermilk. Beat in another third of flour mixture, then second half of buttermilk. End with the last third of the flour mixture, beat until well combined, making sure to scrape down the bowl with a spatula.

4. In a small bowl, mix vinegar and baking soda. Be careful as it will fizz so don't do it in a shallow bowl. Add vinegar mixture to the cake batter and stir well to combine. Fill cupcake cups with cake batter until they are a little under 3/4 full. I ended up with 20 cupcakes. Place muffin tins in your preheated oven. Bake for approximately 20, rotating pans halfway through. The cupcakes are done when you are able to pat the tops and the cake springs back up. If it sinks down they are not yet complete. Or you can insert a toothpick into the center of a cupcake in the center of the tin and if it comes out clean they are done!

5. Cool the cupcakes in their tins on a wire rack for 10 minutes then remove and allow to cool completely before frosting.

6. Enjoy!


The reason why I love red velvet cupcakes so much is because of their rich and deep flavor. They aren't too sweet and they taste the way they look - like red velvet cupcakes!

There are many red velvet cupcake recipes floating around, but the one that I gave to you should really be excellent. It's the cream of the red velvet cupcake recipe crop! I promise as long as you follow the directions properly, and remember what I have taught you, your red velvet cupcakes should come out exactly as you imagine.

You could decorate them with little pink and whit hearts, sprinkles, or anything else your hearth desires.

Good luck with the red velvet cupcake recipe! I hope your red velvet cupcakes come out perfect!


Monday 9 February 2009

Cupcake Pans and Other Cupcake Tools

photo credit: www.hankuan.com.tw


We are almost ready to start making cupcakes. But first, I want to talk a little about the non-ingredients of cupcake recipes. Cupcake pans and other tools you will need to start making your perfect cupcakes.

Cupcake pans are more commonly referred to as muffin pans, so if you have your muffin pan, don't worry it's the same thing!
There are 2 main different kinds of cupcake pans. There is aluminum cupcake pan and then there is the increasingly popular silicone pan (silicone muffin pan).

The silicone cupcake pan is becoming more and more popular since it makes cupcake clean up easier and it's also easier to get cupcakes out of a silicone cupcake pan than it is an aluminum one. I still use aluminum. I've been in the cupcake baking business for decades and I like tradition. But I would recommend, especially if you're not quite a seasoned baker yet, the silicone cupcake pan as it will be easier for you to use and create less fuss. Both aluminum and silicone cupcake pans come in an array of shapes, sizes, colors and amounts. You can get a silicone cupcake tray for up to 36 cupcakes. I think the smallest amount is 6, but and generally increases from there in increments of three. Silicone cupcake trays come most commonly in red and blue, but I've seen them on occasion in pink and purple and yellow. Colored kitchen tools are just more fun to use! I myself prefer using pink kitchen gadgets.
You can get mini silicone cupcake pans or regular size silicone cupcake pans. The same goes for aluminum cupcake pans. If you are using the aluminum variety, make sure you use a generous amount of non stick spray or butter (I prefer butter but non stick spray is healthier). You can also use a little non stick for silicone cupcake pans. It won't hurt! It will only make things that much easier.
Silicone cupcake pans also come in a variety of shapes. The most standard - the cupcake shape (or muffin shape). I've also seen silicone cupcake pans in the shape of hearts, pumpkins, stars and a few other things. If you're desperate for a specific shape and you can't find a silicone cupcake pan in that shape, you can always custom order it!

Now that you have your silicone cupcake tray ready to go, here are a few other things that you will need to complete your cupcake recipe.

You will need two mixing bowls. One for wet and one for dry. You will need a mixer (handheld electric will do). Measuring cups and a pyrex (a glass measuring cup). Measuring spoons. A clean workspace. Clean hands.

To make the cupcake frosting you will need:
Mixing Bowl. A standup mixer is preferable for the frosting but if you don't have one a handheld will do just fine.
A long flat metal spatula to mix the frosting and to frost the cupcakes! That's it!
I will have a whole section of frosting cupcakes which is also something that you need to practice to get right.

No you're ready to make your cupcakes! Take out that silicone cupcake pan and get ready!

Cupcake Ingredients for Cupcake Recipes

Cupcake recipes make baking cupcakes as easy as 1 - 2 - 3! You don't have to know how to cook to bake cupcakes. Cupcake recipes make it easy and for everyone. But before we begin baking the most scrumptious cupcakes we need to review some general rules about baking cupcakes.
Like anything, your first attempt at baking cupcakes won't be perfect. It's an art and it takes time to perfect that art. The more you practice, the nicer your cupcakes will be!
You need three main things before you start baking your first batch of cupcakes:
1- A killer cupcake recipe (which I will be providing for you so you can check that off the list!)
2- The right set of tools and some knowledge of how the cupcake ingredients work.
3- A lot of cupcake love.

If you can check all of those things off your list, then you are ready to start making cupcakes.

If you can't check off number 2, then you are in the right place because I will explain to you the ins, the outs, the goods and the uglies of baking cupcakes.

First of all, cupcake ingredients: flour, milk, eggs, butter (I use salted but if you want to add the salt separately be my guest and use unsalted) baking powder, sugar, vanilla extract.
These ingredients are the basics of what you will need to make cupcakes. Most of these cupcake ingredients are pretty straightforward, but I'm going to explain a few things about a few of these ingredients to you.
First I'm going to separate into dry cupcake ingredients and wet cupcake ingredients. This isn't as straightforward as you may think.

Dry Cupcake Ingredients: Wet Cupcake Ingredients:
Flour Milk
Baking Powder Eggs
Butter Vanilla Extract
Sugar

You might be wondering why butter falls into the category of dry cupcake ingredients and why sugar is wet. Just accept it. In the baking world, that's how we do it. Okay, if you demand an explanation, here it is. Butter, unless melted, would be very difficult to combine with dry ingredients if it is already in with wet ingredients. So we add it to the dry cupcake ingredients first to create a sort of crumble-like texture which makes it easier to add the wet ingredients to after. To understand why sugar is a wet cupcake ingredient, first I will explain baking powder and it's properties. Baking powder is a leavening agent, which means it makes things rise. (so we don't have flattened cupcakes!) The baking powder becomes activated when it becomes wet. Baking powder makes flour rise. Sugar does not rise. For example, if you put together sugar and baking powder and added some milk, nothing would rise. When you add sugar to dry ingredients, it doesn't always distribute itself evenly. But to wet ingredients you have a better chance at having evenly distributed sugar in your cupcakes! This is due to the texture of the sugar.
Something very important about adding dry cupcake ingredients and wet cupcake ingredients - You want to add the wet to the dry and you don't want to do it all at once. The way it works is as soon as the leavening (the baking powder) gets wet, it is activated. From there the clock begins to tick. You don't want to over agitate your cupcake ingredients after you add the wet to the dry because if you overmix your cupcakes will not rise properly. The goal is to mix just enough, not too much or too little. It might take a few tries to get right, but this is very important. It's what separates the bad cupcakes from the good cupcakes. We want to treat our cupcake ingredients with respect because cupcake ingredients do not grow on trees!

I believe you now should have a good understanding of cupcake ingredients and how they work. You are almost ready to begin using your cupcake ingredients. Before I will talk about tools you need for cupcake recipes!

Cupcake Recipes


image courtesy of clever cupcakes


For years and years I tried to find the best cupcakes in all the world. Ambitious, yes, but wholly worth my time. I've loved cupcakes since I was a little girl. It came as no surprise to anyone that when I grew up I became a baker - a cupcake baker. Yes, it is true. I work in a cupcake bakery. I won't mention it's name, but it's definitely got a reputation and competes for the title of best cupcakes in New York City. I'm not here to spill the bakeries secrets (okay, maybe a few), I'm here to spill my own cupcake secrets. Over the years I have perfected the art of baking cupcakes. Chocolate, vanilla, red velvet cupcakes. The list goes on. Frostings from butter, chocolate, cream cheese, to boiled vanilla. This is the resource for all you cupcake needs. You won't be left in the dark. Every week I will give you at least one cupcake recipe, maybe more. If you have any requests for any kind of cupcake just go ahead and ask! If you aren't a fan of my cupcake recipes, there are other places that have excellent cupcake recipes. Ivillage has excellent recipes, as does nibbledish. Good luck!

You will find the best cupcake recipes here, coming from someone who has dedicated her life to those mini cakes me all love so much!