Saturday, 11 September 2010

Cupcake Boxes

photo courtesy of sugar craft by rosie


I've always loved baking for other people's special occasions. I like to know that my baked goods can bring a smile to someone's face and make their day a little brighter. Since I was young I was the resident baker for birthdays, holidays, and anything else. Pretty soon I began baking for extended family, and then family friends, and after that it just took off! Cupcakes were always a big hit and most requested. The problem I was constantly running into was how to get the cupcakes from my kitchen to the location without making a huge mess! For a while I insisted on frosting my cupcakes when they were already at location but this wasn't a great solution. Luckily, there are other ways to solve the problem.
Cupcake boxes!
These are boxes that are specifically designed for transporting cupcakes. They make cupcake boxes for individual cupcakes, and cupcake boxes for up to a dozen. These generally are two leveled boxes. The top level will have a hole cut out to fit a standard sized cupcake perfectly.
There are also many companies that make cupcake boxes and sell the cupcake holders separately. It's important to buy both from the same company so they fit right. Cupcake boxes that are all wobbly won't be very good at transporting your cupcakes.
Cupcake boxes with holders protect cupcakes from moving in the box and therefore prevent a mess. These are also sometimes called cupcake carriers. The best way to figure out which cupcake box is right for you is to just do a little bit of research. Amazon.com is the perfect place to do that, as you will find many different manufacturers and customer ratings. I personally like BRP box shop cupcake boxes. They're very attractive which I always think is important. Especially when making cupcake for a living, you want to present your client with the best looking cupcake box which should reflect what's inside - your cupcakes!
If you're up for a project it's not difficult to make your own cupcake boxes from scratch. All you need is some good quality card stock, scissors, and some glue. After you construct your own boxes, it's simply to make cupcake holders that are customized to fit directly into your cupcake boxes. This is a great project for kids, especially when they've made cupcakes for a grandparent or other family member. They can decorate the cupcake boxes with magic markers, glitter, crayons, stickers, or anything else!
I've had a lot of inquiries as to how to transport cupcakes, so to anyone who was wondering I hope this helps. Who would have thought that there would be boxes made specifically for cupcakes!?
I hope you enjoyed reading about cupcake boxes and come back soon for more recipes, decorating tips, and everything else cupcakes!
Thursday, 26 August 2010

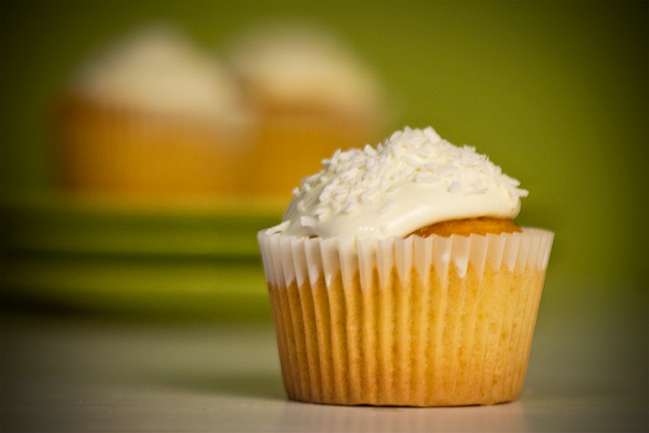
Coconut Cupcakes

photo courtesy of shimelle


One of my favorite desserts is coconut cupcakes! I've always found coconut cupcakes a little tricky. They either turn out too dense or too flavorless. Sometimes it tastes like a sponge with a big scoop of shredded coconut on top!
That's why I made it my business to bring you a great coconut cupcake recipe that actually tastes as good as it sounds. The secret ingredient is....coconut! I use coconut milk and shredded coconut where other recipes use regular milk and coconut extract.
Coconut cupcakes are a great treat for many reasons. It looks like a basic vanilla cupcake and therefore can be used and decorated for all sorts of occasions. This includes holidays such as Halloween, the Fourth of July, and Christmas. They can make for very festive winter cupcakes since shredded coconut resembles snow.  They make great birthday cupcakes, excellent wedding cupcakes, and perfect any-time-you-have-a-craving-for-coconut cupcakes!

Coconut Cupcakes Ingredients:

3 cups cake flour (not self rising)
2 heaping tsp Baking Powder
3 sticks (1.5 cups) salted butter
2 1/4 cups sugar
.5 tsp pure vanilla extract
1 cup coconut milk
8 large egg whites
1 1/3 cups shredded sweetened coconut
frosting of your choice (I'll cover this later)
toasted coconut for garnishing (optional)
Makes 2 dozen
  • Preheat over to 350. Line cupcake pans with paper liners.
  • In a bowl mix together flour and baking powder.
  • In another bowl beat butter and 2 cups sugar until light and fluffy. With an electric mixer this should be about 3 or 4 minutes.
  • Add vanilla. Carefully add one third of the flour mixture while still beating. Then add half of the coconut milk. Then add the second third of the flour mixture, and then add the rest of the coconut milk. Finish by adding the rest of the flour mixture. When it is combined (careful not to overmix!) set aside.
  • In a clean bowl, whisk together egg whites and remaining 1/4 cup of sugar. You can do this manually or with an electric mixer. Beat until stiff and glossy peaks begin to form. 
  • Gently fold the egg mixture into the butter and flour mixture. Until combined. You might want to do this in 2 parts. Then carefully stir in the shredded coconut. Don't over mix!
  • Divide batter in cupcake pans, using about 1/4 cup of batter for each cupcake.
  • Bake for 20-25 minute. Rotate pans half way through. The cupcakes are down when they turn golden brown and a toothpick comes out clean from the center. 
  • Allow to cool.
  • For toasted coconut: I use fresh coconut. It has amazing flavor and really adds a nice touch. This will go on top of the frosting. You can buy coconut meat, raw, or buy the whole coconut and go from there. Use 2 coconuts. Grate the coconut meat. Spread out on baking sheet and place in over preheated to 350. Allow to cook keeping an eye on it! If it's cooking unevenly, rotate the pan. It's done when it's just starting to turn golden brown
As far as frosting goes, this is really a personal choice. Using buttercream frosting is fine! It tastes great with these coconut cupcakes. I, personally, love chocolate and coconut together, so I use chocolate frosting. Some people pair lemon frosting with these cupcakes, and some like boiled frosting with them. You can also pair them with cream cheese frosting. Coconut cupcakes, as I said before, go with nearly everything. So these are the perfect cupcakes for all you coconut lovers!

Enjoy and come back soon for more cupcakes recipes.

Sunday, 18 July 2010

Pumpkin Cupcakes Recipe


Photo courtesy of mise-n-place

Well, I've taken quite a long hiatus and pursued other interests for a while, but alas, I keep coming back to cupcakes! I just can't seem to get enough and in my time away I've picked up a great pumpkin cupcakes recipe. I've also picked up a good deal more of cupcake recipes which I'll be sure to post a few times a month (I'm aiming for once a week but I can't make any promises). As usual, if you would like a specific recipe, have any questions or comments feel free to shoot me an email and I'll get back to you as soon as I take my cupcakes out of the oven!

Probably the most requested of cupcake recipes I'm asked for are pumpkin. Whether it's the season for Halloween cupcakes or something else, I don't know, but either way they're quite a delicious treat!

This is a sweet snack that can be enjoyed all year round. Pair it with your favorite icing (I prefer cream cheese frosting but use whatever you'd like!)

Makes about 18 cupcakes
Preheat over to 350 F and line cupcake pans with liners

2 C all purpose flour
1 tsp baking soda
1 heaping tsp baking powder
1 tsp ground ginger
1.5 tsp ground cinnamon
1/4 tsp freshly grated nutmeg
1/4 tsp ground all spice
1 C packed light brown sugar
3/4 C granulated sugar
1 C salted butter
4 large eggs
15 oz pumpkin puree

In a bowl whisk flour, baking soda and powder, ginger, cinnamon, nutmeg, all spice. In another bowl whisk brown and granulated sugar with butter and eggs. Whisk in dry ingredients (be careful not to over mix!) and then add pumkin puree.
Pour batter into prepared cupcake pans and put it in the over for 20-25 minutes, rotating the pan halfway.

When they're done take them out and let the pumpkin cupcakes cool. Now they're ready to be frosted! I prefer mine with cream cheese frosting, but I've had friends who prefer theirs with chocolate frosting or vanilla. You can choose whatever you'd like to top your pumpkin cupcakes!

Pumpkin cupcakes can be used on many occasions. Halloween is the first that comes to mind, but they can be very festive during Autumn in general. Try them out as Thanksgiving cupcakes and decorate with cranberries! As a fun activity with your children you can have pumpkin cupcake decorating parties before holidays. People tend to love pumpkin which makes these an excellent choice for parties or other social events such as dinners and potlucks.

These cupcakes taste best when fresh so I would not recommend freezing them, though they'll still be yummy if you do. I've eaten these topped with so many different things and they're always so delicious. For something different try a cranberry and chocolate frosting. Or use vanilla frosting and sprinkle crushed up oreos on top. You could use any color sprinkles, honey or maple icing, the possibilities truly are infinite.

Well, I promise to be more up to date posting cupcake recipes to fill your hearts and tummies.
Enjoy these pumpkin cupcakes! I know I will!

Friday, 29 January 2010

Valentines Cupcakes


photo courtesy of hlkljgk

Valentines cupcakes are the perfect way to let your loved one's know you care! Everyone loves a sweet and tasty treat! February 14th is one of my favorite days of the year for this reason. Decorating cupcakes is one of my top five things I love to do, and Valentines cupcakes allow me to go crazy. The possibilities are endless, if you keep just three things in mind: chocolate, love, and the color red.
For Valentines cupcakes, I almost always use red velvet cupcakes as a base or chocolate cupcakes. I like to use a white frosting, like buttercream, cream cheese, or boiled (all of which you can find recipes for right here, on my site). If you really don't like chocolate, though, vanilla cupcakes with just a hint of red food dye make for a perfect base, as well.
White frostings also allow you to add a hint of red food dye for a festive and pink frosting.

Here are some tips for decorating your Valentine's Day cupcakes:
1. Candy/sugar hearts - everyone loves hearts on valentines day. Pink, red and white hearts are a perfect way to top off your cupcakes.
2. Think Pink - pink, white, and red sprinkles, pink frosting, pink, pink, pink!
3. Fruit - I know, I know. I always talk about food dyes. But I try to remind you all that food dye can be very hazardous to your health. Once in a while won't kill you, but if you can avoid it then why not? So what are other ways to make pink frosting? Crushed raspberries will add a nice touch. Cherries also work. Or you could always use white frosting and use fruit as a garnish.

So without further adieu, I'm going to give you some excellent Valentine's Day cupcakes decorating ideas that do not involve food dye or food coloring.

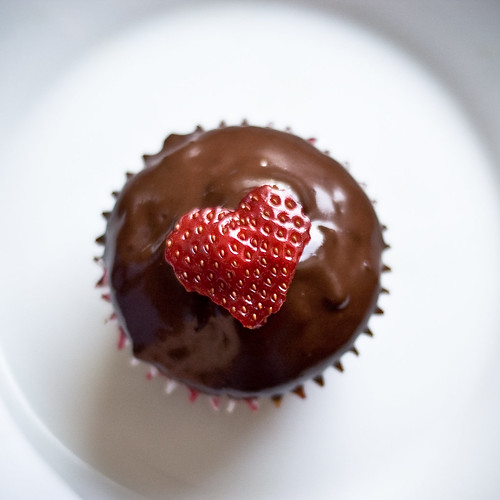
Black forest cupcakes - Chocolate cupcakes with boiled frosting and chocolate dipped cherries. These are simple to make, elegant, and delicious. Take dark red cherries and in a double boiler melt some dark chocolate (or milk if you prefer). Dip your cherries in the melted chocolate halfway, and when they cool and dry place them a top your cupcake. For a little extra garnish, sprinkle some cocoa powder. You could also put cherries in the chocolate batter (no pits!!!!) if you want to bake them into your cupcakes. It will be delicious. If you don't like cherries, you could use strawberries instead to top off your Valentine's Day cupcakes. I like to leave the stem on. Cut the strawberries long ways in half. Dip one half in melted chocolate and place them on the cupcakes flat side down.

Jelly cupcakes - Valentine's Day cupcakes are all about reds and pinks. Any preservative in that color will work. Strawberry, raspberry, or whatever else you've got is fine! These can be made in a number of ways depending on what you're looking for.
Method 1 - Use a chocolate or vanilla base. Bake your cupcakes and let them cool completely. Before you frost them, take a small paring knife or a melon baller. Scoop out from the top center of the cupcake about an inche in diameter and length. If you are using a paring knife, make sure your cuts are clean and round. Fill the whole with whichever jelly you choose. For a stuffed cupcake (paring knife) replace the piece of cupcake you had removed and then frost. For the melon baller, Fill the round whole entireley with jelly. Then, instead of frosting just sprinkle some powdered sugar on top.
Method 2 - Bake your cupcakes and let them cool. Frost as normal using any white frosting. Be generous with the frosting! From the center of the frosting with the back of a spoon create a wide and shallow well. Fill the well with jelly and there you have cute and food dye-free Valentines cupcakes.

I hope you have a great day, filled with love and romance, and enjoy your Valentines cupcakes!